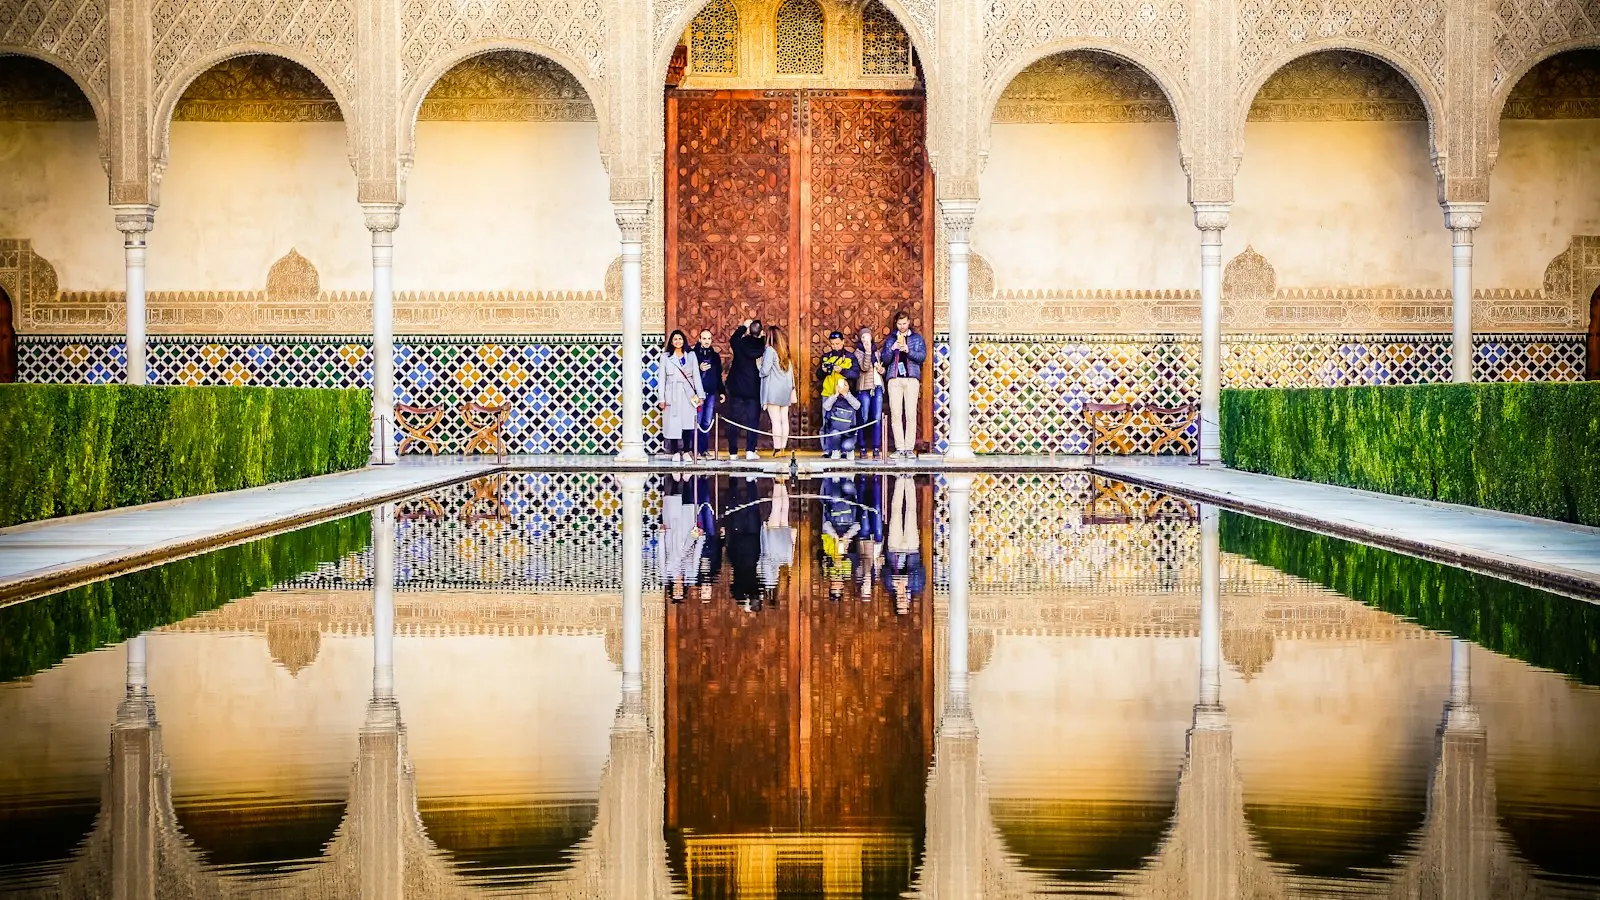
The best way to photograph Moorish architecture with a phone is to control perspective before pressing the shutter, expose carefully for bright surfaces, and edit for believable texture rather than dramatic HDR. Use the standard lens whenever possible, reserve ultra-wide for genuinely tight spaces, and treat RAW, night mode, and computational processing as tools with trade-offs—not automatic improvements.
Moorish buildings combine pale sunlit walls, deep shade, reflective tiles, repeating geometric patterns, narrow courtyards, ornate arches, and busy visitor areas. The approach below is designed for iPhones and Android phones alike, while recognizing that camera controls vary by model and software version.
Key Takeaways
- Use the standard lens for the most natural proportions; choose ultra-wide only when the space is too tight to capture otherwise.
- Expose for important bright surfaces, such as pale walls and sunlit tiles, then check whether shadow detail remains usable.
- HDR can balance bright and dark areas, but movement, reflections, halos, and overprocessed texture can reduce realism.
- Keep the phone level, use symmetry and repetition deliberately, and correct perspective gradually rather than reshaping the building.
- In dim interiors, use available light and a steady grip, avoid flash unless explicitly permitted, and check each monument’s current photography rules.
Choose the right phone lens and camera setup
Start with the standard, or main, lens for most architectural scenes. It usually gives walls, arches, tilework, plaster, and carved wood more balanced proportions than an ultra-wide lens, especially near the edges of the frame. For a symmetrical doorway or a line of columns, it is often the safest choice.
Moving backward is usually better than switching immediately to ultra-wide. A very wide lens can make nearby columns appear oversized, push distant walls away, and stretch arches or floor patterns toward the corners. That exaggerated look may help show the size of a cramped courtyard, but it can weaken a geometric architecture photo when straight lines and repeated forms are the subject.
Use the ultra-wide lens when the space itself is the story: a narrow passage, small courtyard, or interior where you cannot step back. Keep important details away from the extreme edges, and check whether columns or arches visibly lean or expand. If the phone offers lens correction, it may reduce some distortion, but it cannot make every ultra-wide composition look like a standard-lens photograph.
A telephoto lens, when available, is useful for isolating a carved panel, an arch within an arch, or a repeating tile pattern across a courtyard. It can also help you photograph details without standing too close or including distracting visitors. A digital crop can serve a similar purpose in good light, but it may reveal more noise or sharpening when the image is enlarged.
Before photographing, clean the lens. Fingerprints are particularly damaging in bright courtyards and around reflective tiles because they spread highlights and reduce contrast. Hold the phone level, use a two-handed grip, and check which controls your specific camera actually provides. Exposure compensation, manual focus, RAW or ProRAW, dedicated lens selection, optical telephoto, panorama, and night mode are not available in the same way on every phone.
Preserve detail in bright courtyards and high-contrast exteriors
In a courtyard with bright plaster and shaded arcades, begin by identifying the most important bright area. Tap or place the exposure target on a sunlit wall, pale stone surface, or bright section of tilework, then lower exposure slightly if highlights are losing their pattern. A small reduction can preserve texture that would otherwise become a featureless white patch.
Do not automatically expose for the darkest archway. Doing so may protect shadow detail but turn the courtyard into a mass of clipped highlights. It is often better to keep the brightest important surface usable and accept that very deep shadows will remain dark, particularly when the scene exceeds what the phone sensor and processing can record.
Exposure compensation works differently across phones, but the practical goal is the same: make the captured frame slightly darker or lighter while watching the preview. If the preview shows no visible texture in a pale wall, reduce exposure. If shaded tilework becomes an empty black shape and the bright area is not especially important, raise exposure cautiously.
HDR phone photography can help when both bright and dark areas matter. The phone may combine several exposures or apply computational adjustments to retain more apparent detail across the scene. This can be effective for an arcade opening onto a sunny courtyard or an interior that includes bright windows.
HDR is not a guarantee. Moving visitors, leaves, candles, or reflections can produce ghosting and uneven edges when the phone combines exposures. Strong processing can also create halos around arches, flatten the difference between sun and shade, or make plaster, tile, and stone look overly crisp. Compare the HDR result with the phone’s more natural-looking option when available.
RAW or ProRAW can be useful when lighting is difficult and you plan to edit later. It generally gives compatible editing software more image data and control than a processed JPEG or HEIF, but it does not recover highlights that were already clipped or detail hidden by motion blur. RAW files also take more storage, may look dull before processing, and require more careful work with white balance, shadows, highlights, and sharpening.
Use RAW because you need editing flexibility, not because it is automatically sharper. A well-processed standard file may look better than a poorly edited RAW file, especially when traveling and trying to produce a finished image quickly. If contrast is extreme, take a second composition from a different position or exposure rather than assuming software can reconstruct missing information. Some phones support exposure bracketing, but it is not universal, and moving subjects can make multiple exposures difficult to combine.
Use geometry, repetition, and scale to make detail readable
Moorish architecture gives you strong compositional structures: horseshoe arches, tiled grids, colonnades, courtyards, water channels, carved screens, and repeated shadows. Instead of trying to include every detail, choose one visual system and organize the frame around it.
For a symmetrical view, stand as centrally as the space allows and align the phone with the doorway, arch, or central axis. Check the edges and floor lines before taking the picture. Small shifts in position can make a tiled grid look uneven, while tilting the phone can cause columns to converge dramatically.
Symmetry is not the only option. A row of arches can lead the eye into the distance, while a close crop of repeating tiles can turn a wall into an abstract pattern. A telephoto lens or careful crop is often better for this than filling the frame with an ultra-wide view.
Include a person, doorway, or familiar architectural element when you need to show scale, provided doing so does not disturb visitors or violate site rules. A figure beneath a large arch can communicate height more effectively than a caption. If people block the main pattern, wait for a clearer layer, change your angle, or make a detail photograph instead.
Patience and position often matter more than a newer phone. Move a few steps to remove a barrier from the center of the frame, wait for a gap in foot traffic, or use a side angle to separate overlapping figures from the architecture. Do not block a passage or ask visitors to move simply to improve a personal photograph.
Photograph dim interiors without making historic spaces look artificial
In a dim tiled hall or covered courtyard, begin with available light. Use a careful two-handed grip, brace your elbows against your body, and stabilize the phone against a permitted surface if one is available. Avoid leaning on, touching, or placing equipment against historic walls, columns, screens, or other architectural elements.
Night mode or another computational low-light mode can brighten a dark interior, but it works best when the phone and subject remain relatively still. Moving visitors may appear blurred or repeated, and fine patterns in tiles or carved surfaces may be smoothed by noise reduction. Reflective surfaces can also produce unexpected bright patches.
If a bright window or courtyard is inside the frame, expose for that highlight first and make a separate image of the interior detail if necessary. One frame may not hold convincing information in both areas. A wider environmental photograph can show the relationship between rooms, while a closer detail frame can use a simpler tonal range and produce cleaner texture.
Avoid flash unless the site explicitly permits it. Flash can flatten the relief that makes carving and tilework readable, create harsh reflections, distract other visitors, and conflict with a monument’s photography policy. Historic sites may also restrict flash, tripods, photography in certain rooms, or commercial use, and those rules differ by institution and can change.
A panorama can be useful for a long courtyard or wide interior when the phone supports it and the scene is relatively still. However, it can bend architectural lines or distort repeating patterns if you sweep too quickly or rotate around an inconsistent position. Treat it as a way to record the space, not as a guaranteed replacement for a carefully composed standard frame.
Correct perspective and edit with restraint
Perspective correction should begin in the camera position. Keep the phone as level as possible and avoid pointing sharply upward if you want vertical columns and walls to remain believable. Stepping farther back and using the standard lens often creates a more natural result than standing close and correcting an extreme angle afterward.
There is a useful difference between correcting converging verticals and reshaping a building. Moderate correction can make a doorway look more like it appeared to the eye. Excessive correction may stretch the top of an arch, compress the floor, or create unnatural proportions at the edges.
In editing, recover highlights until pale walls regain texture, then lift shadows only enough to reveal useful information. Preserve the differences between blue, green, ochre, white, and terracotta tiles instead of applying a single strong color effect. Historic interiors often contain subtle variations that excessive saturation can erase.
Use clarity, texture, and sharpening carefully. Repeating geometric patterns can tempt you to increase these controls, but aggressive settings create bright outlines, crunchy grout, and artificial-looking carved surfaces. Check the image at full size for halos, smoothed details, and processing artifacts before exporting.
If your editing app offers lens or perspective correction, apply it gradually and compare the result with the original. The strongest-looking version is not necessarily the most accurate. The goal is to preserve the character of the space, including its shade, worn surfaces, reflective tiles, and natural color differences.
Finally, check the current rules for the specific monument before you shoot. Look for restrictions on flash, tripods, stabilizing equipment, photography in restricted rooms, visitor access, and commercial use. A photograph can be technically successful and still be inappropriate if it requires entering a closed area, blocking a route, or ignoring the institution’s conditions.
FAQ
Which phone lens is best for photographing Moorish architecture?
Use the standard lens for balanced proportions, straight architectural lines, and most detailed scenes. Use ultra-wide for genuinely cramped courtyards or interiors, while keeping important edges away from the corners. Use telephoto, when available, to isolate arches, carved details, and repeating geometric patterns from a distance.
Should I use HDR or RAW for bright courtyards and dark interiors?
HDR can help retain both sunlit and shaded information, but movement, reflections, halos, and overprocessed texture are possible. RAW or ProRAW is useful when you plan to edit and need more control, but it uses more storage and cannot restore clipped highlights, missed focus, or motion blur.
How can I keep arches and walls straight in phone architecture photos?
Keep the phone level, align it carefully with the building’s central lines, and move backward before choosing an ultra-wide lens. Apply perspective correction moderately in editing. If the correction makes arches or columns look stretched, reduce it and accept a little natural convergence.
How can I preserve detail in dim interiors without flash?
Use a steady two-handed grip, brace the phone against a permitted surface, and try night mode cautiously. Keep moving subjects out of the most important detail area when possible. Make a separate close-up composition if a bright window or courtyard prevents one frame from holding both interior and exterior detail.
How should historic architecture photos be edited?
Recover highlights and lift shadows selectively, preserve the original color relationships, and use sharpening, clarity, saturation, and HDR effects sparingly. Compare the edit with the unprocessed image so the building still looks like a real space rather than a heavily processed illustration.